How to Connect Meta Ads to ASIO
Connect Meta Ads to ASIO, authorize the correct assets, and select the ad account ASIO will use for campaigns.
Last updated:
This connection allows ASIO to use the selected Meta ad account for campaign creation and publishing. Before starting, make sure the Page, Business Portfolio, ad account, payment method, and Meta permissions are already complete.
Connect the account
Open the Integration Center
Inside ASIO, open your account menu and select Integration Center.
Find Meta Ads
In the Meta Ads card, click Connect.
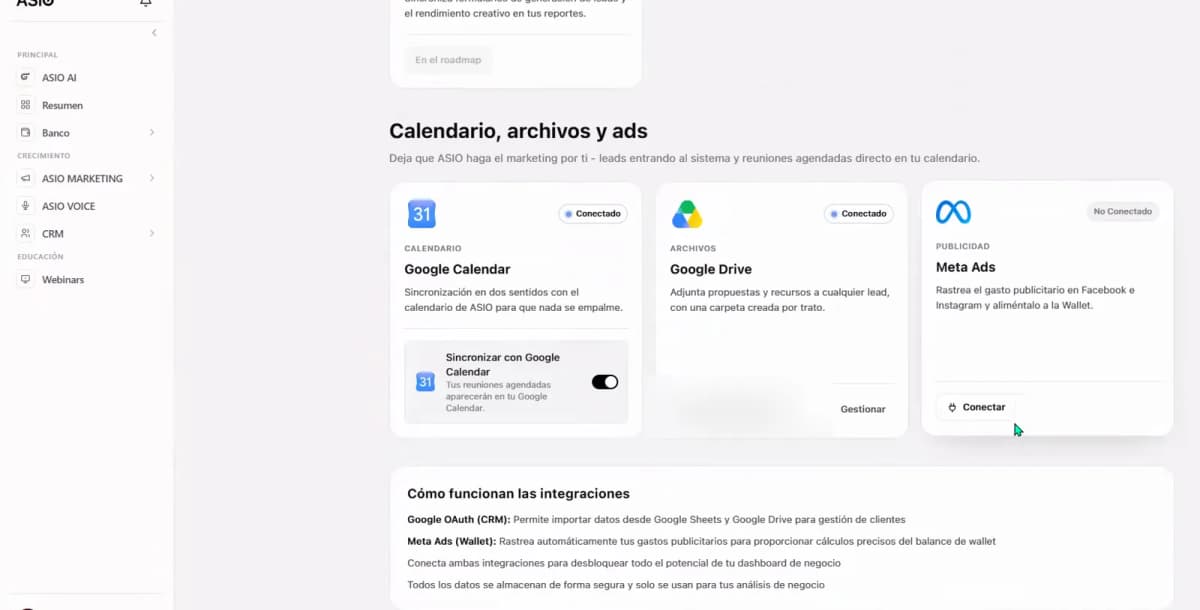
Open the Meta Ads integration from the ASIO Integration Center. Start the Meta authorization
In Meta Business Integration Wallet, select Connect Meta Business.
Continue with the correct Facebook profile
Confirm that the displayed profile is the one that manages the business assets.
Authorize Pages
Enable all current and future Pages, then continue.
Authorize businesses
Enable all current and future businesses, then continue.
Authorize Instagram accounts
Enable all Instagram accounts that ASIO should be able to access.
Save the authorization
Review the request, click Save, and confirm the connection message inside ASIO.
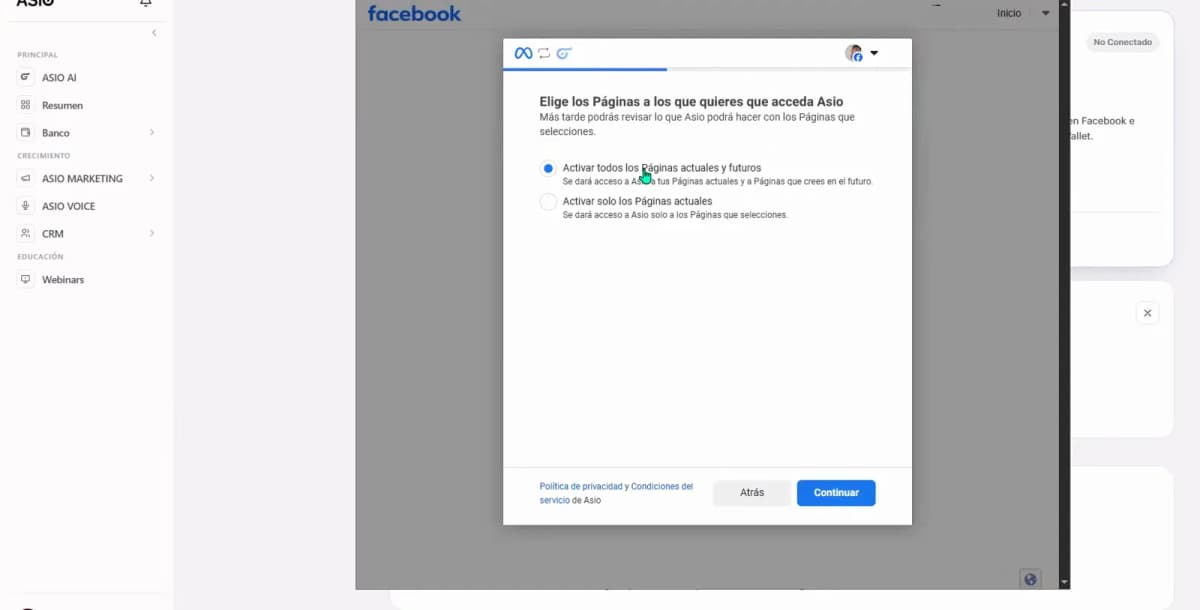
Authorize the Pages and other Meta assets ASIO needs to access.
Select the correct ad account
Open Change ad account
After Meta connects, select Change ad account inside the Meta Ads integration.
Choose the business ad account
Select the ad account created for the business. Do not leave the default personal account selected by mistake.
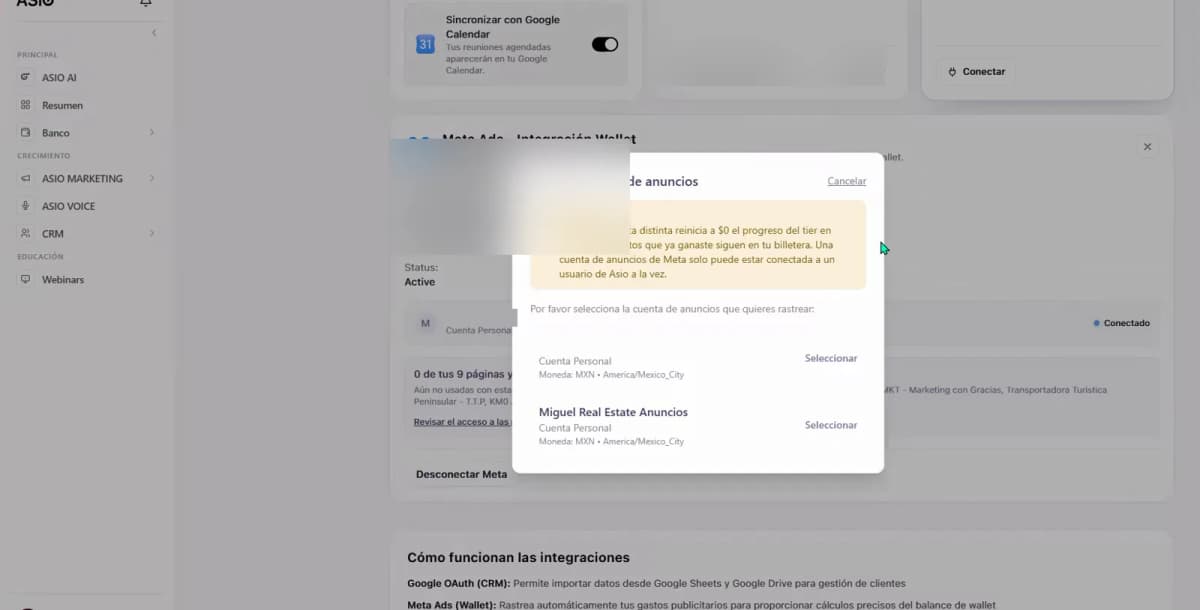
Select the business ad account instead of the personal account. Wait for synchronization
ASIO will synchronize the selected account. When it finishes, refresh the page to update the integration status.
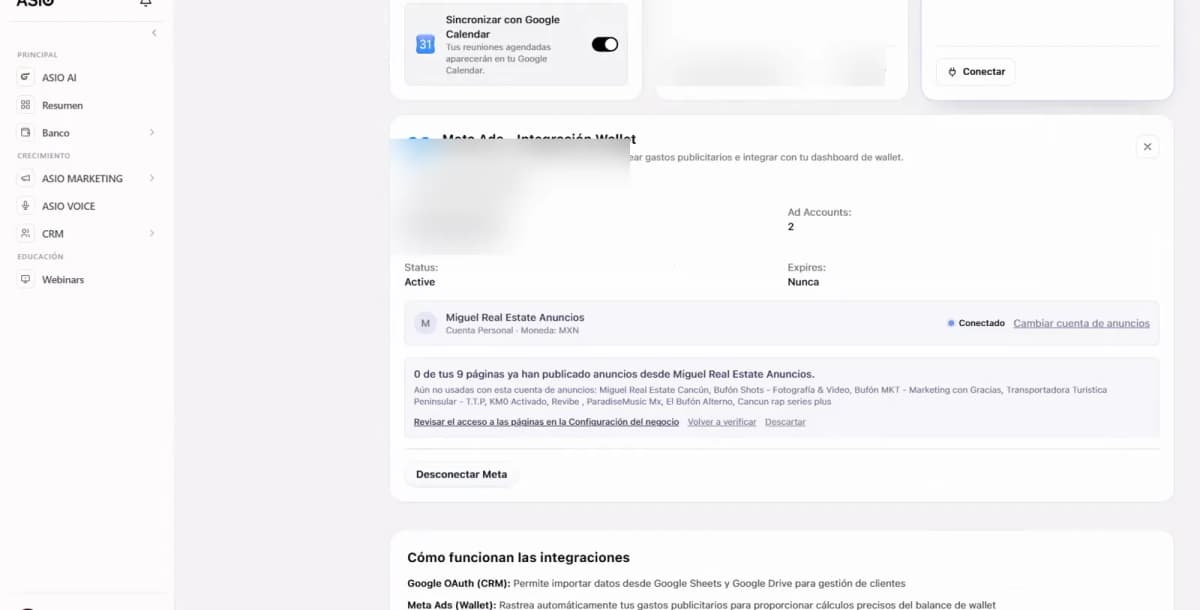
The Meta integration shows the selected business ad account as connected.
How to confirm it is connected
Check you are done
- The Meta integration displays Connected or Active.
- The correct business ad account name appears inside the integration.
- The number of active integrations updates after the page is refreshed.
Common problems
- ASIO selected a personal ad account
- Click Change ad account and select the account created for the business.
- The Page or ad account does not appear
- Open Meta Business settings and confirm that your Facebook user has access to the Page and ad account. Then return to ASIO and verify or reconnect the integration.
- The screen says that zero Pages have published ads
- This is not an error. It only means the selected account has not published a campaign yet.
- The integration status does not update
- Refresh the ASIO page. If the integration still does not appear, disconnect Meta and repeat only the authorization process. You do not need to recreate the Business Portfolio, ad account, or payment method.
Need help?
Open the Support tab inside ASIO. Include a screenshot of the message you see and the name of the ad account you are trying to connect. Never include passwords or payment details.
Was this helpful?