How to Create Your Meta Business Portfolio and Ad Account
Create your Meta Business Portfolio and ad account, add a payment method, and verify access before connecting Meta to ASIO.
Last updated:
The Business Portfolio keeps your business assets in one place: the Facebook Page, the Instagram account, the WhatsApp Business account, and the ad account. The ad account is the asset used to create, publish, and pay for campaigns.
Before you begin
- A Facebook Page for the business.
- Access to Meta Business Suite from the Facebook profile that manages the Page.
- A working business email address.
- A valid payment card for the advertising budget charged directly by Meta.
Create the Business Portfolio
Open Meta Business Suite
Open the business Page and select Meta Business Suite from the left menu.
Open Ads Manager
From Meta Business Suite, select Ads Manager and open the account overview.
Open the account selector
Click the box with the account number at the top left.
Create a Business Portfolio
Select Create Business Portfolio, then enter a recognizable business name, your name, and a valid contact email.
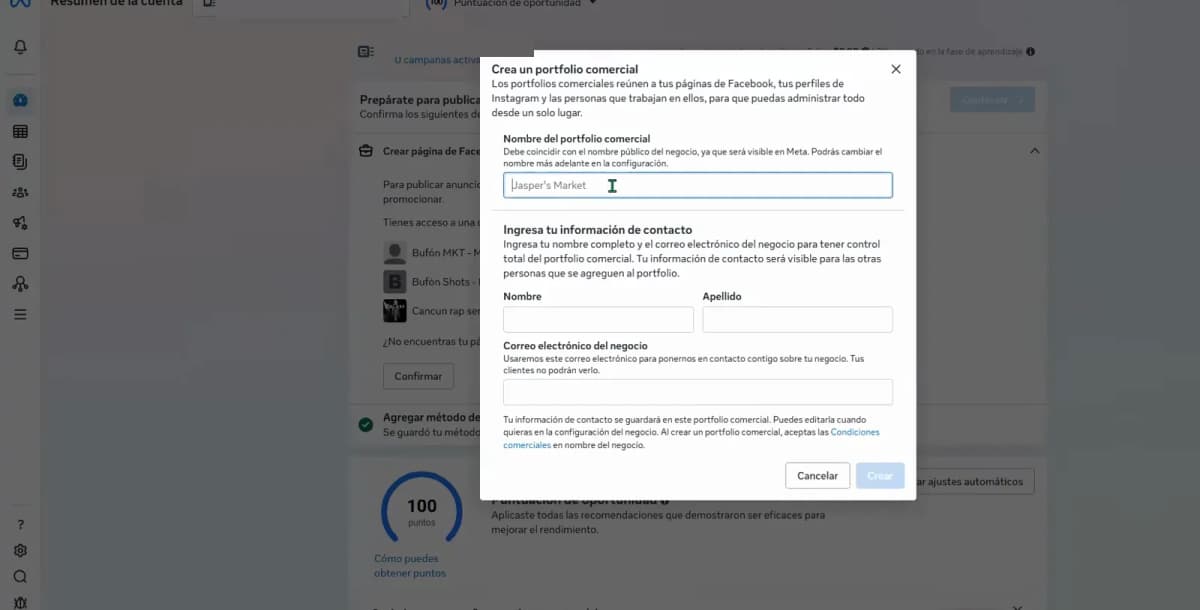
Create the Business Portfolio and enter the business contact information. Add the Facebook Page
Select the Page that will be used for the business and its ads.
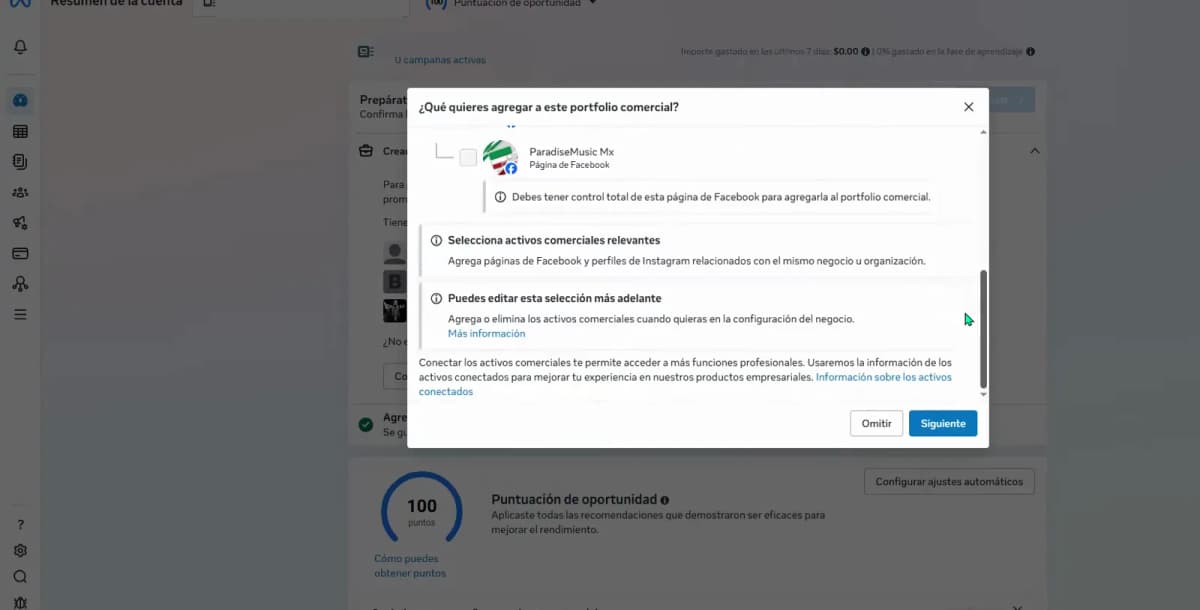
Add the correct Facebook Page to the new Business Portfolio. Choose who has access
Invite another person by email only if they also need to manage the business. Otherwise, continue without adding anyone.
Confirm the portfolio
Review the assets and finish creating the Business Portfolio.
Create the ad account
Return to the account selector
Select the Business Portfolio you just created.
Create a new ad account
In the ad accounts area, select Create a new ad account.
Use a clear name
Use the business name and add "Ads" or "Advertising" so it is easy to identify later.
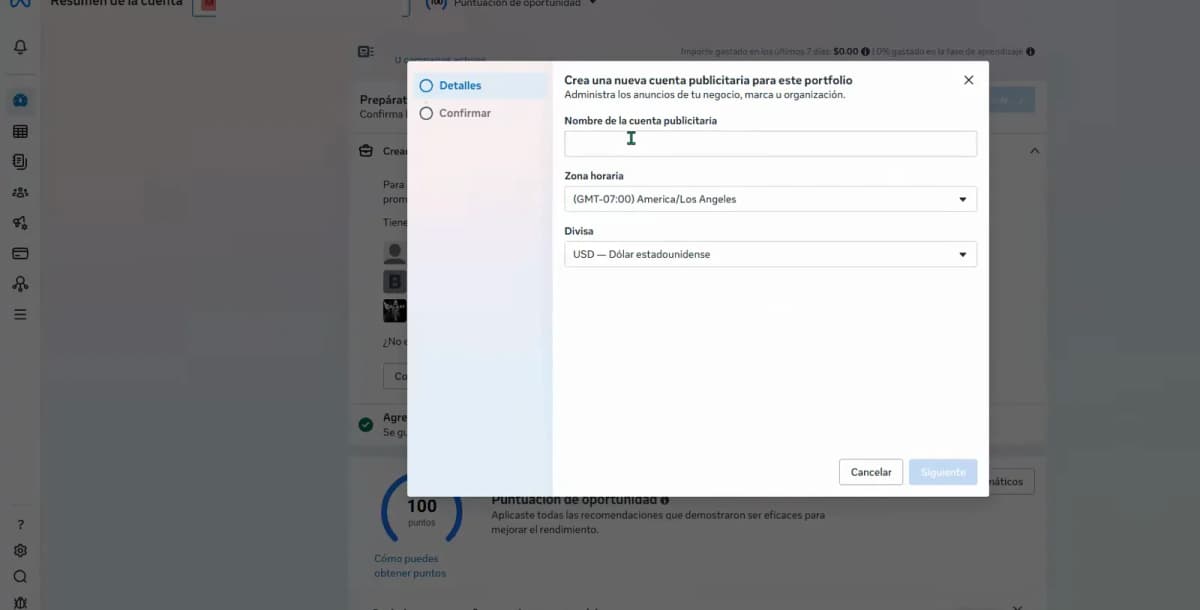
Name the new ad account and continue to its settings. Select the time zone
For Mexico, choose America/Mexico_City. If the business operates elsewhere, select its correct local time zone.
Select the currency
For Mexico, choose Mexican peso (MXN). For another country, choose the currency used to pay for advertising.
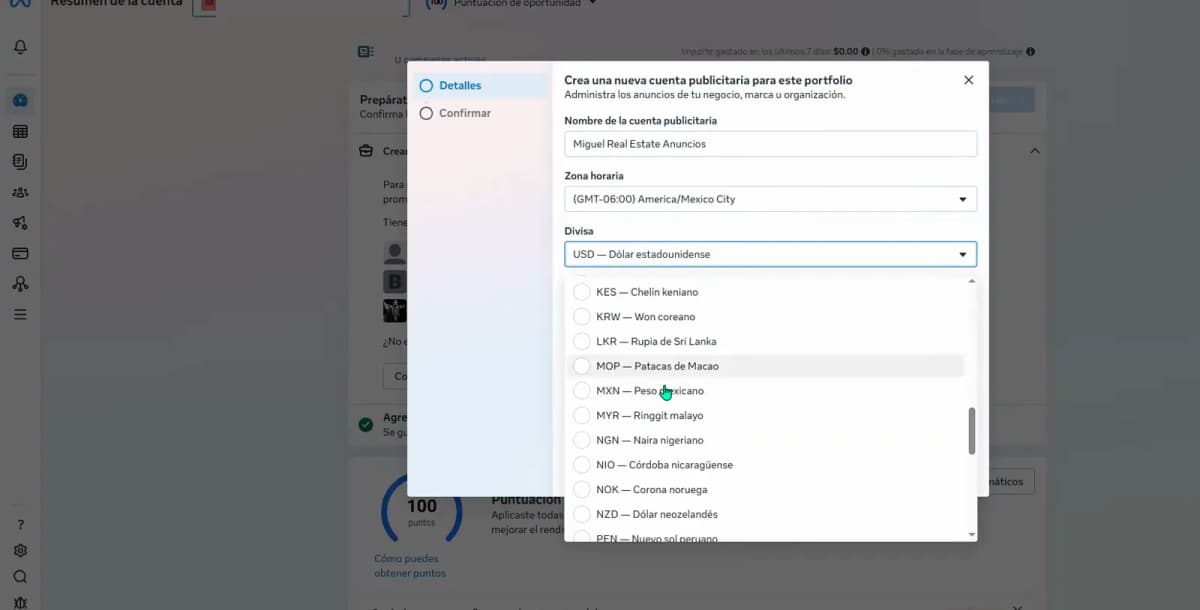
Select the correct time zone and billing currency. Accept Meta's terms
Confirm the commercial terms and privacy policies, then create the ad account.
Add the payment method
Confirm the associated Page
Check that Meta is using the correct Facebook Page.
Select Add payment method
Choose Debit or credit card. Meta may also display other payment options depending on the country.
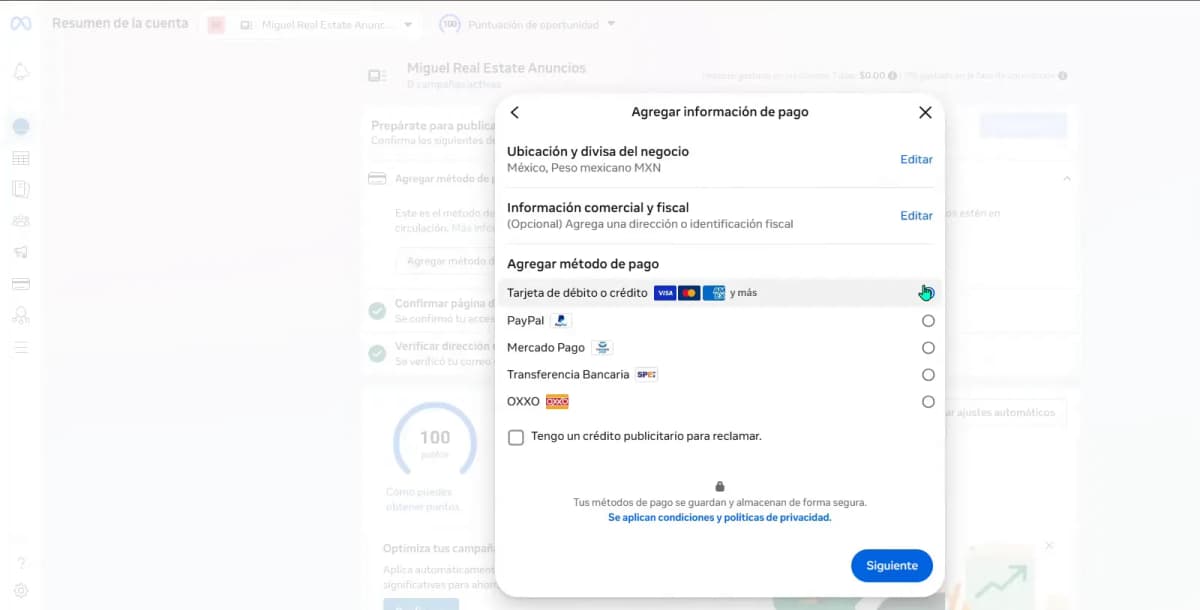
Choose Debit or credit card as the payment method for Meta Ads. Enter the card details
Add the cardholder name, card number, expiration date, and security code exactly as they appear on the card.
Save the payment method
Meta will charge the advertising spend directly to this card. The ASIO subscription does not include the advertising budget.
Verify access
Open Business settings
In Meta Business Suite, select the gear icon or Settings.
Check the Page
Confirm that the correct Page appears and that your user has full access.
Check People
Confirm that your user is active and has the required permissions.
Check Ad accounts
Confirm that the new ad account is inside the Business Portfolio and that you can access it.
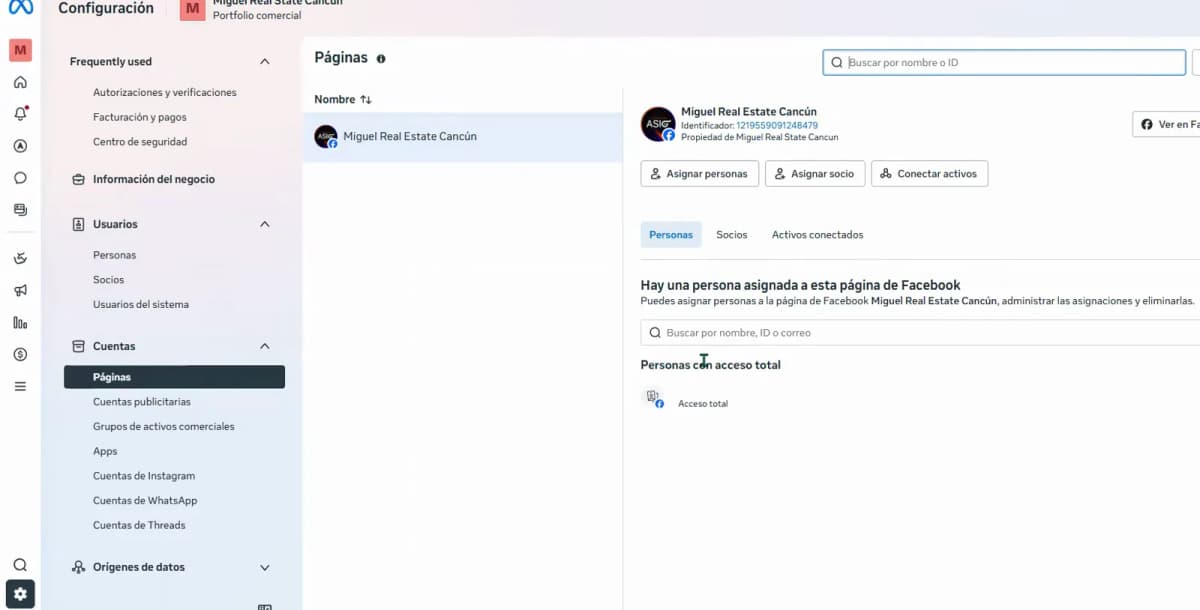
Verify Page, people, and ad-account access in Business settings.
How to confirm you are finished
Check you are done
- The Business Portfolio appears in the account selector.
- The correct Facebook Page is inside the portfolio.
- The new ad account appears inside the portfolio.
- The payment method is saved.
- Your user has access to both the Page and the ad account.
Was this helpful?